U-Boot - i.MX8
From Boundary Devices Wiki
//
This section will provide all the details about the U-Boot bootloader for i.MX8 platforms, from the source code location to the flashing procedure.
Where is U-Boot source code?
Just like most of our source code, it is located on GitHub:
Where to get the latest binary for my platform?
Our build server automatically generates and uploads all the latest binaries to this address:
The README file contains the exact commit ID of this build images.
Also, the up-to-date upgrade.scr U-Boot script is included so you can copy all the files directly to the root of your media storage.
How to flash U-Boot?
Just like for our previous versions, we provide a simplified upgrade script that does it for you.
All you need to do is to copy the images (u-boot.<uboot_defconfig>, upgrade.scr) to either eMMC or USB drive and issue the following command:
=> run upgradeu
This will run the upgrade.scr script and look for a file u-boot.{uboot_defconfig} and burn it.
You can have a look at the upgrade.txt file content to understand the flashing procedure:
NB: U-Boot resides in "Boot Partition 1", not in the main data area.
See this JEDEC presentation to learn about the different partitions available.
How to build U-Boot?
Please read the following page about building the latest U-Boot:
https://boundarydevices.com/u-boot-v2018-07/
How can I configure the display?
Since we offer several display options to our customers, we offer custom method to configure the display from U-Boot.
Just like it was explained in our Display configuration from U-Boot post, you can set an environment variable to specify which display you plan on using.
This mechanism now also works with MIPI displays! Here is an example on how to set up the board to use our BD080MCC1 display.
=> setenv fb_mipi ltk080a60a004t
=> savee
=> reset
Oops, I bricked the device, how do I recover?
Just like our previous unbricking procedure, this platform allows to boot from USB using the Serial Downloader Protocol.
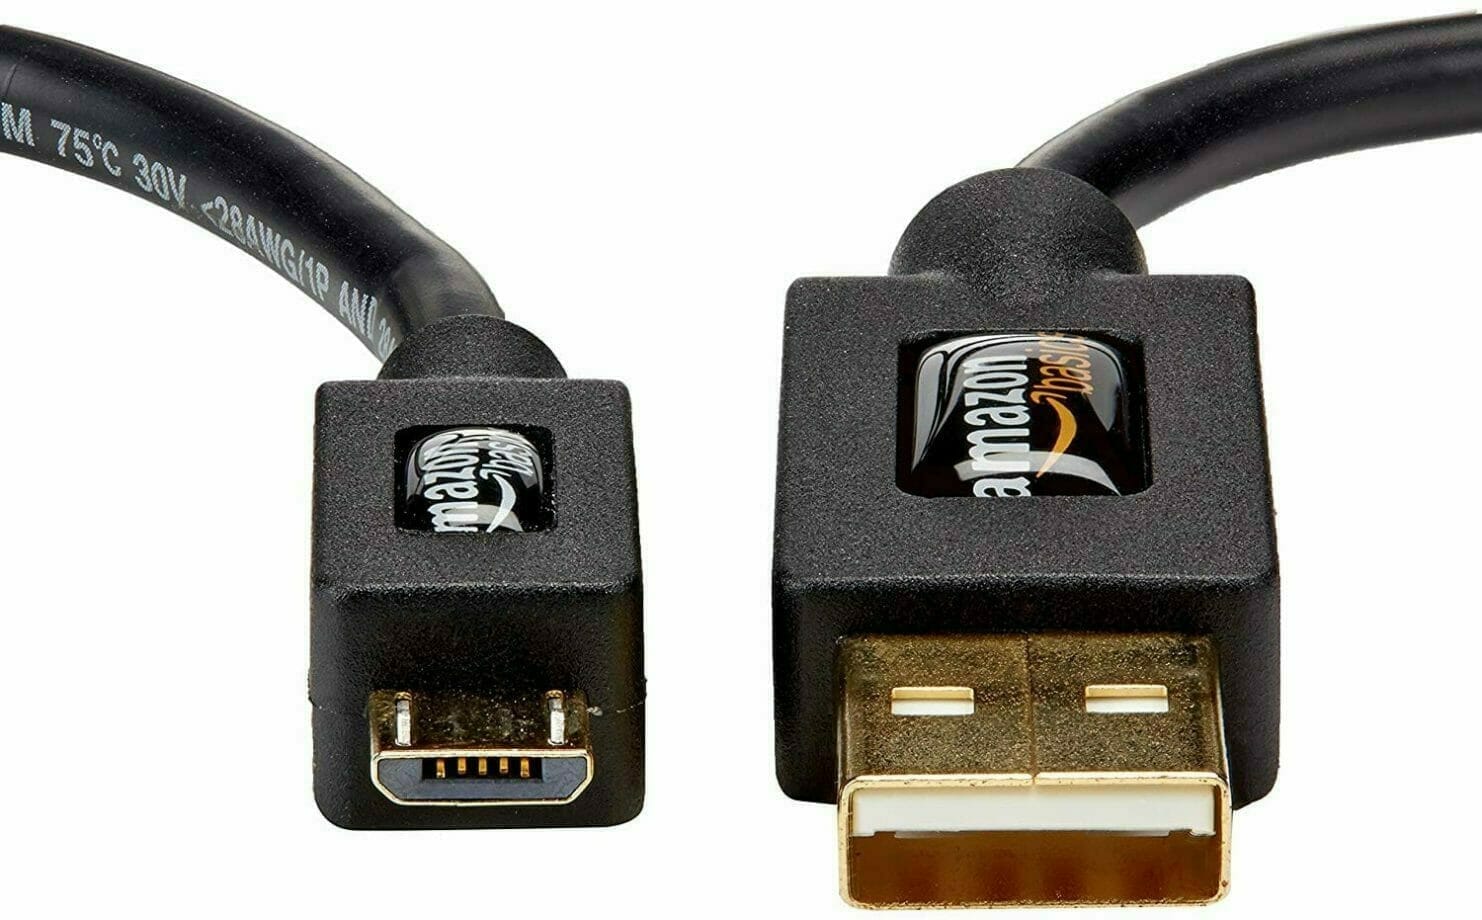
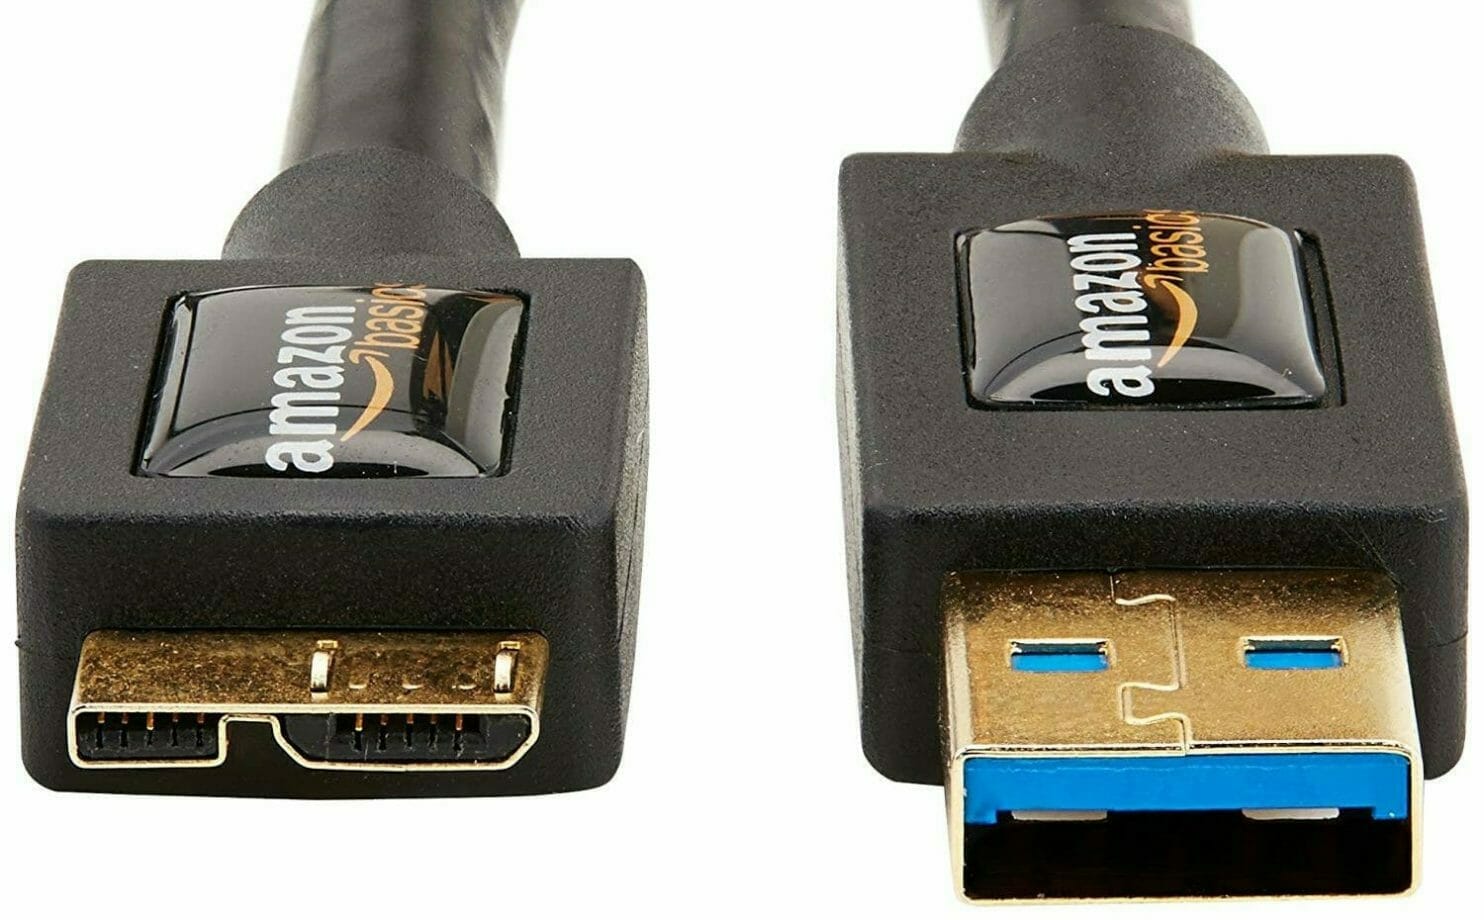
First you'll need to connect your board's USB OTG port to your PC's USP port. You must use USB2.0 cable and not USB3.0 cable
[caption id="attachment_35892" align="alignleft" width="322"][https://pejmank3.sg-host.com/images/d/dd/USB2.0-OTG-e1575666246252.jpg
 ] USB2.0 OTG cable[/caption] [caption id="attachment_35893" align="aligncenter" width="323"][https://pejmank3.sg-host.com/images/4/4c/USB3.0-OTG-e1575666520478.jpg
 ] USB3.0 OTG cable[/caption]
For example: https://www.amazon.com/AmazonBasics-Male-Micro-Cable-Black/dp/B07232M876
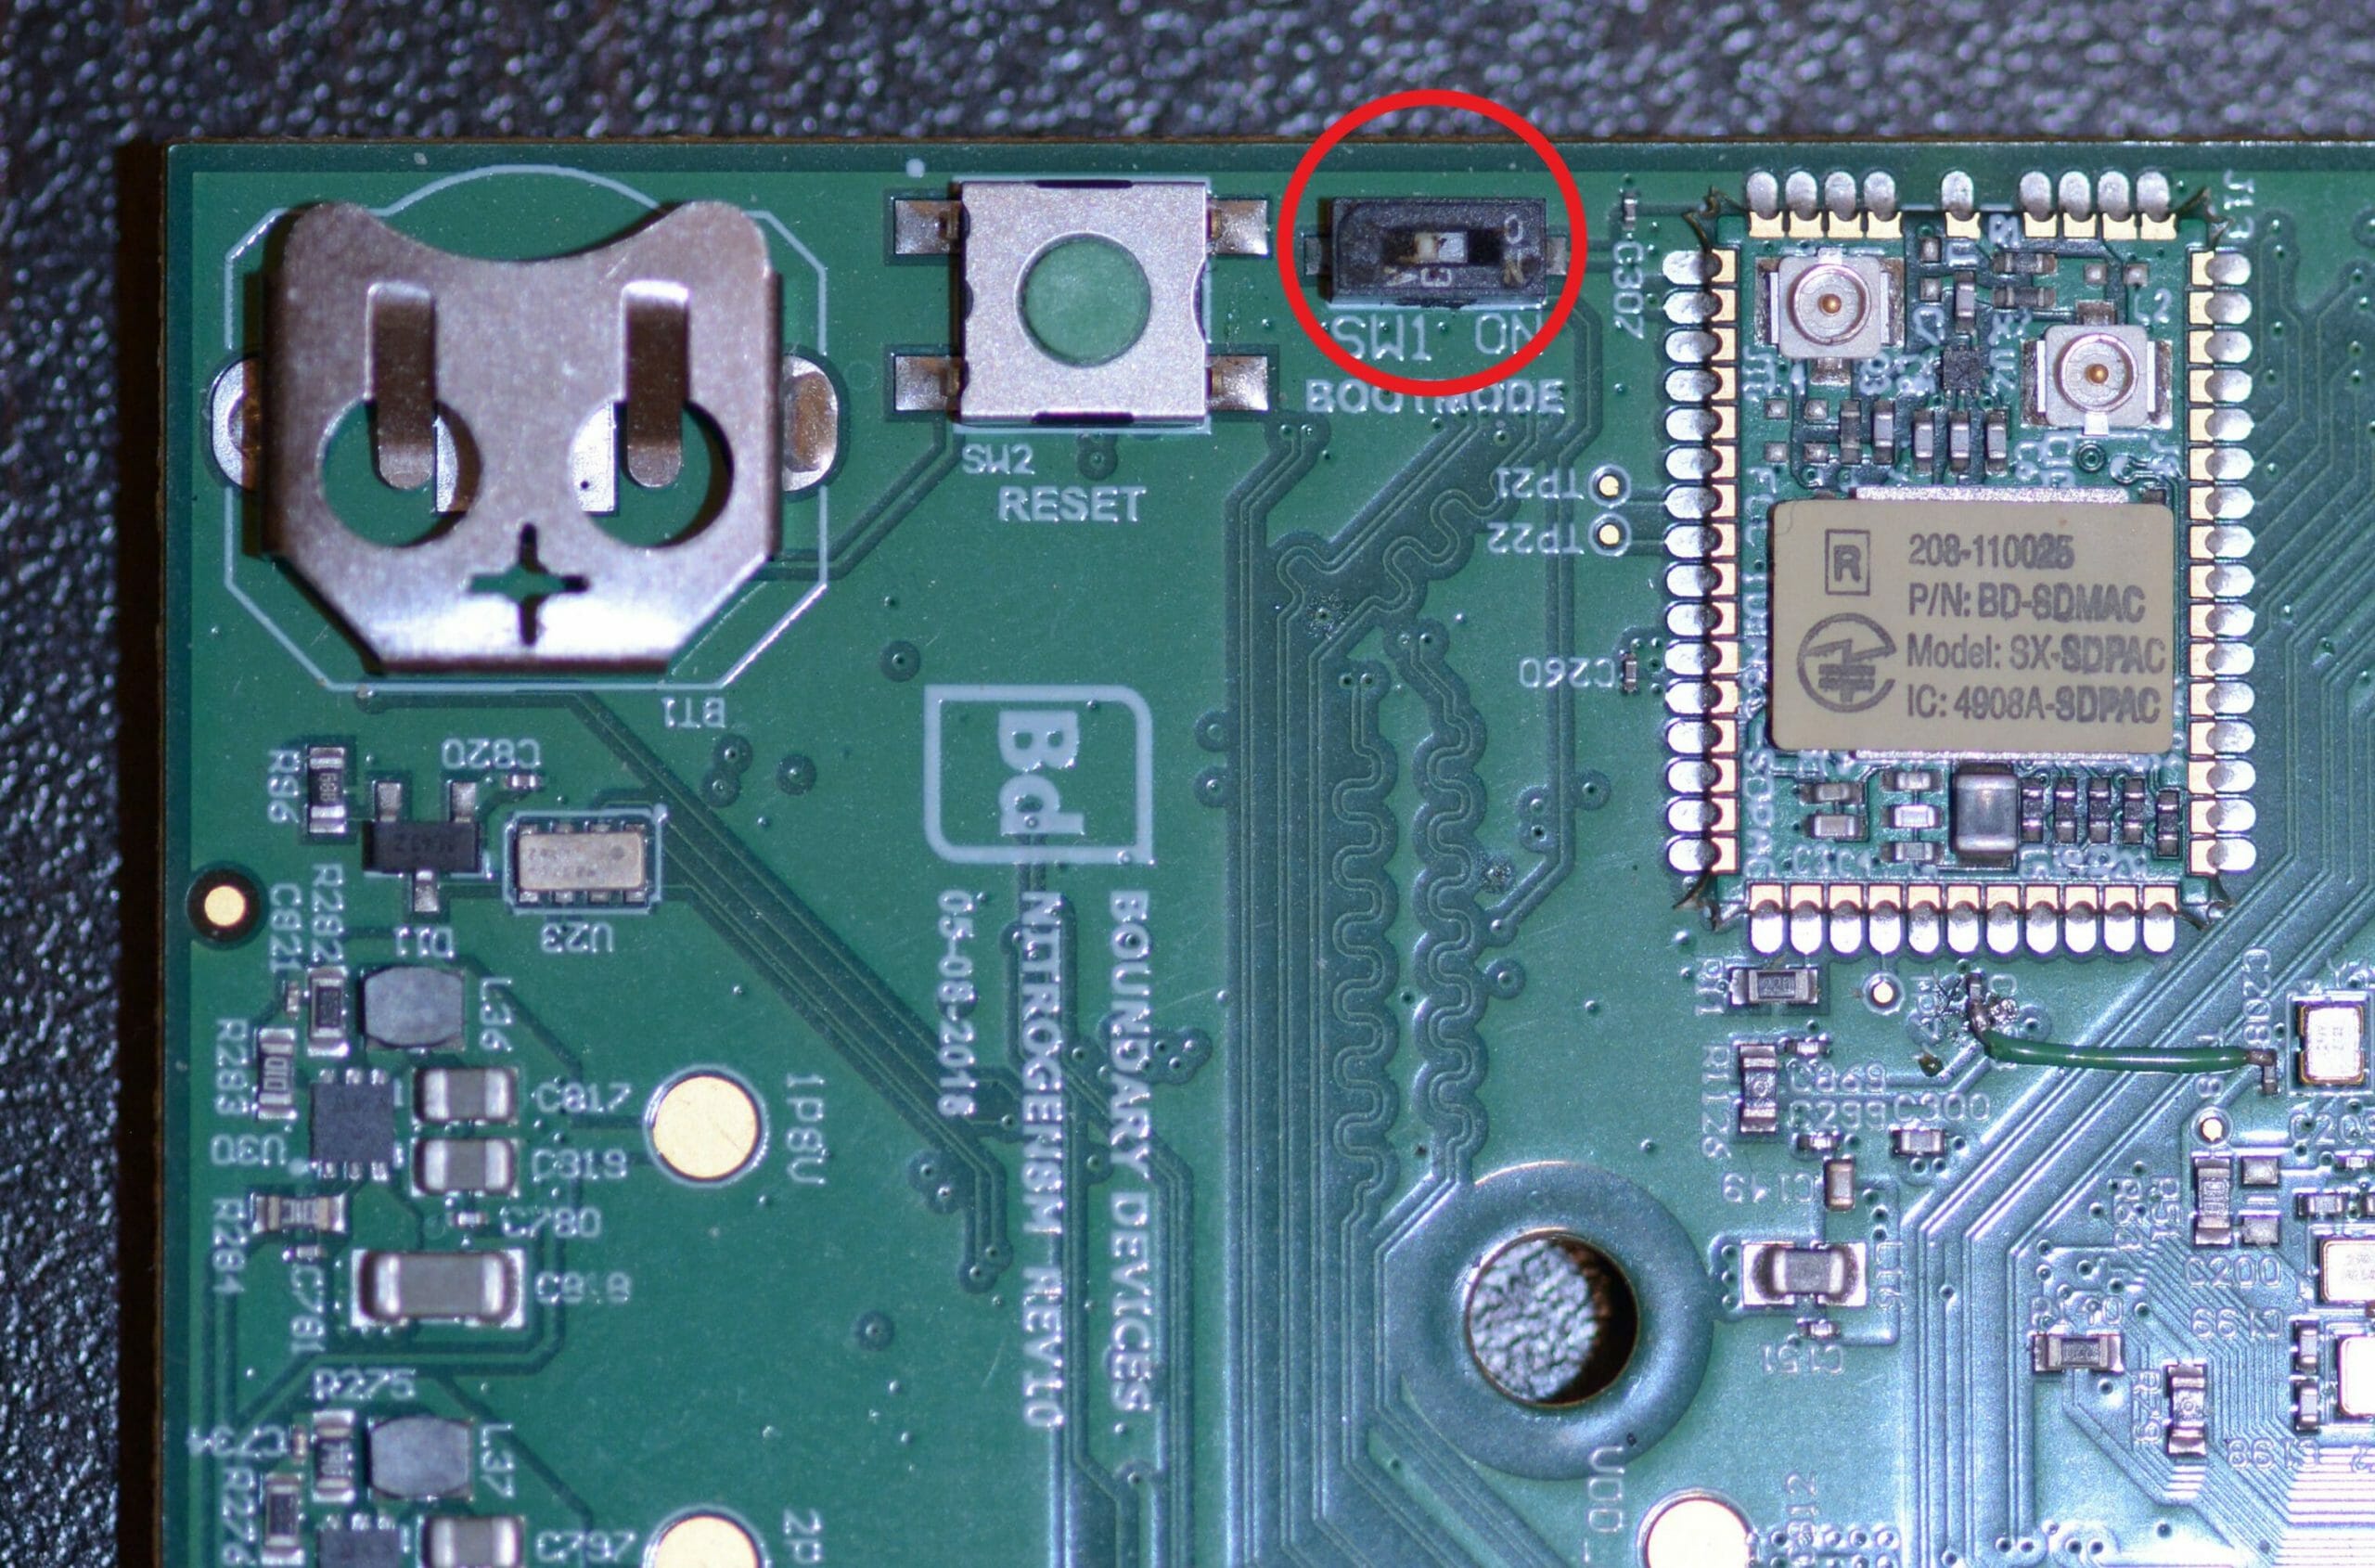
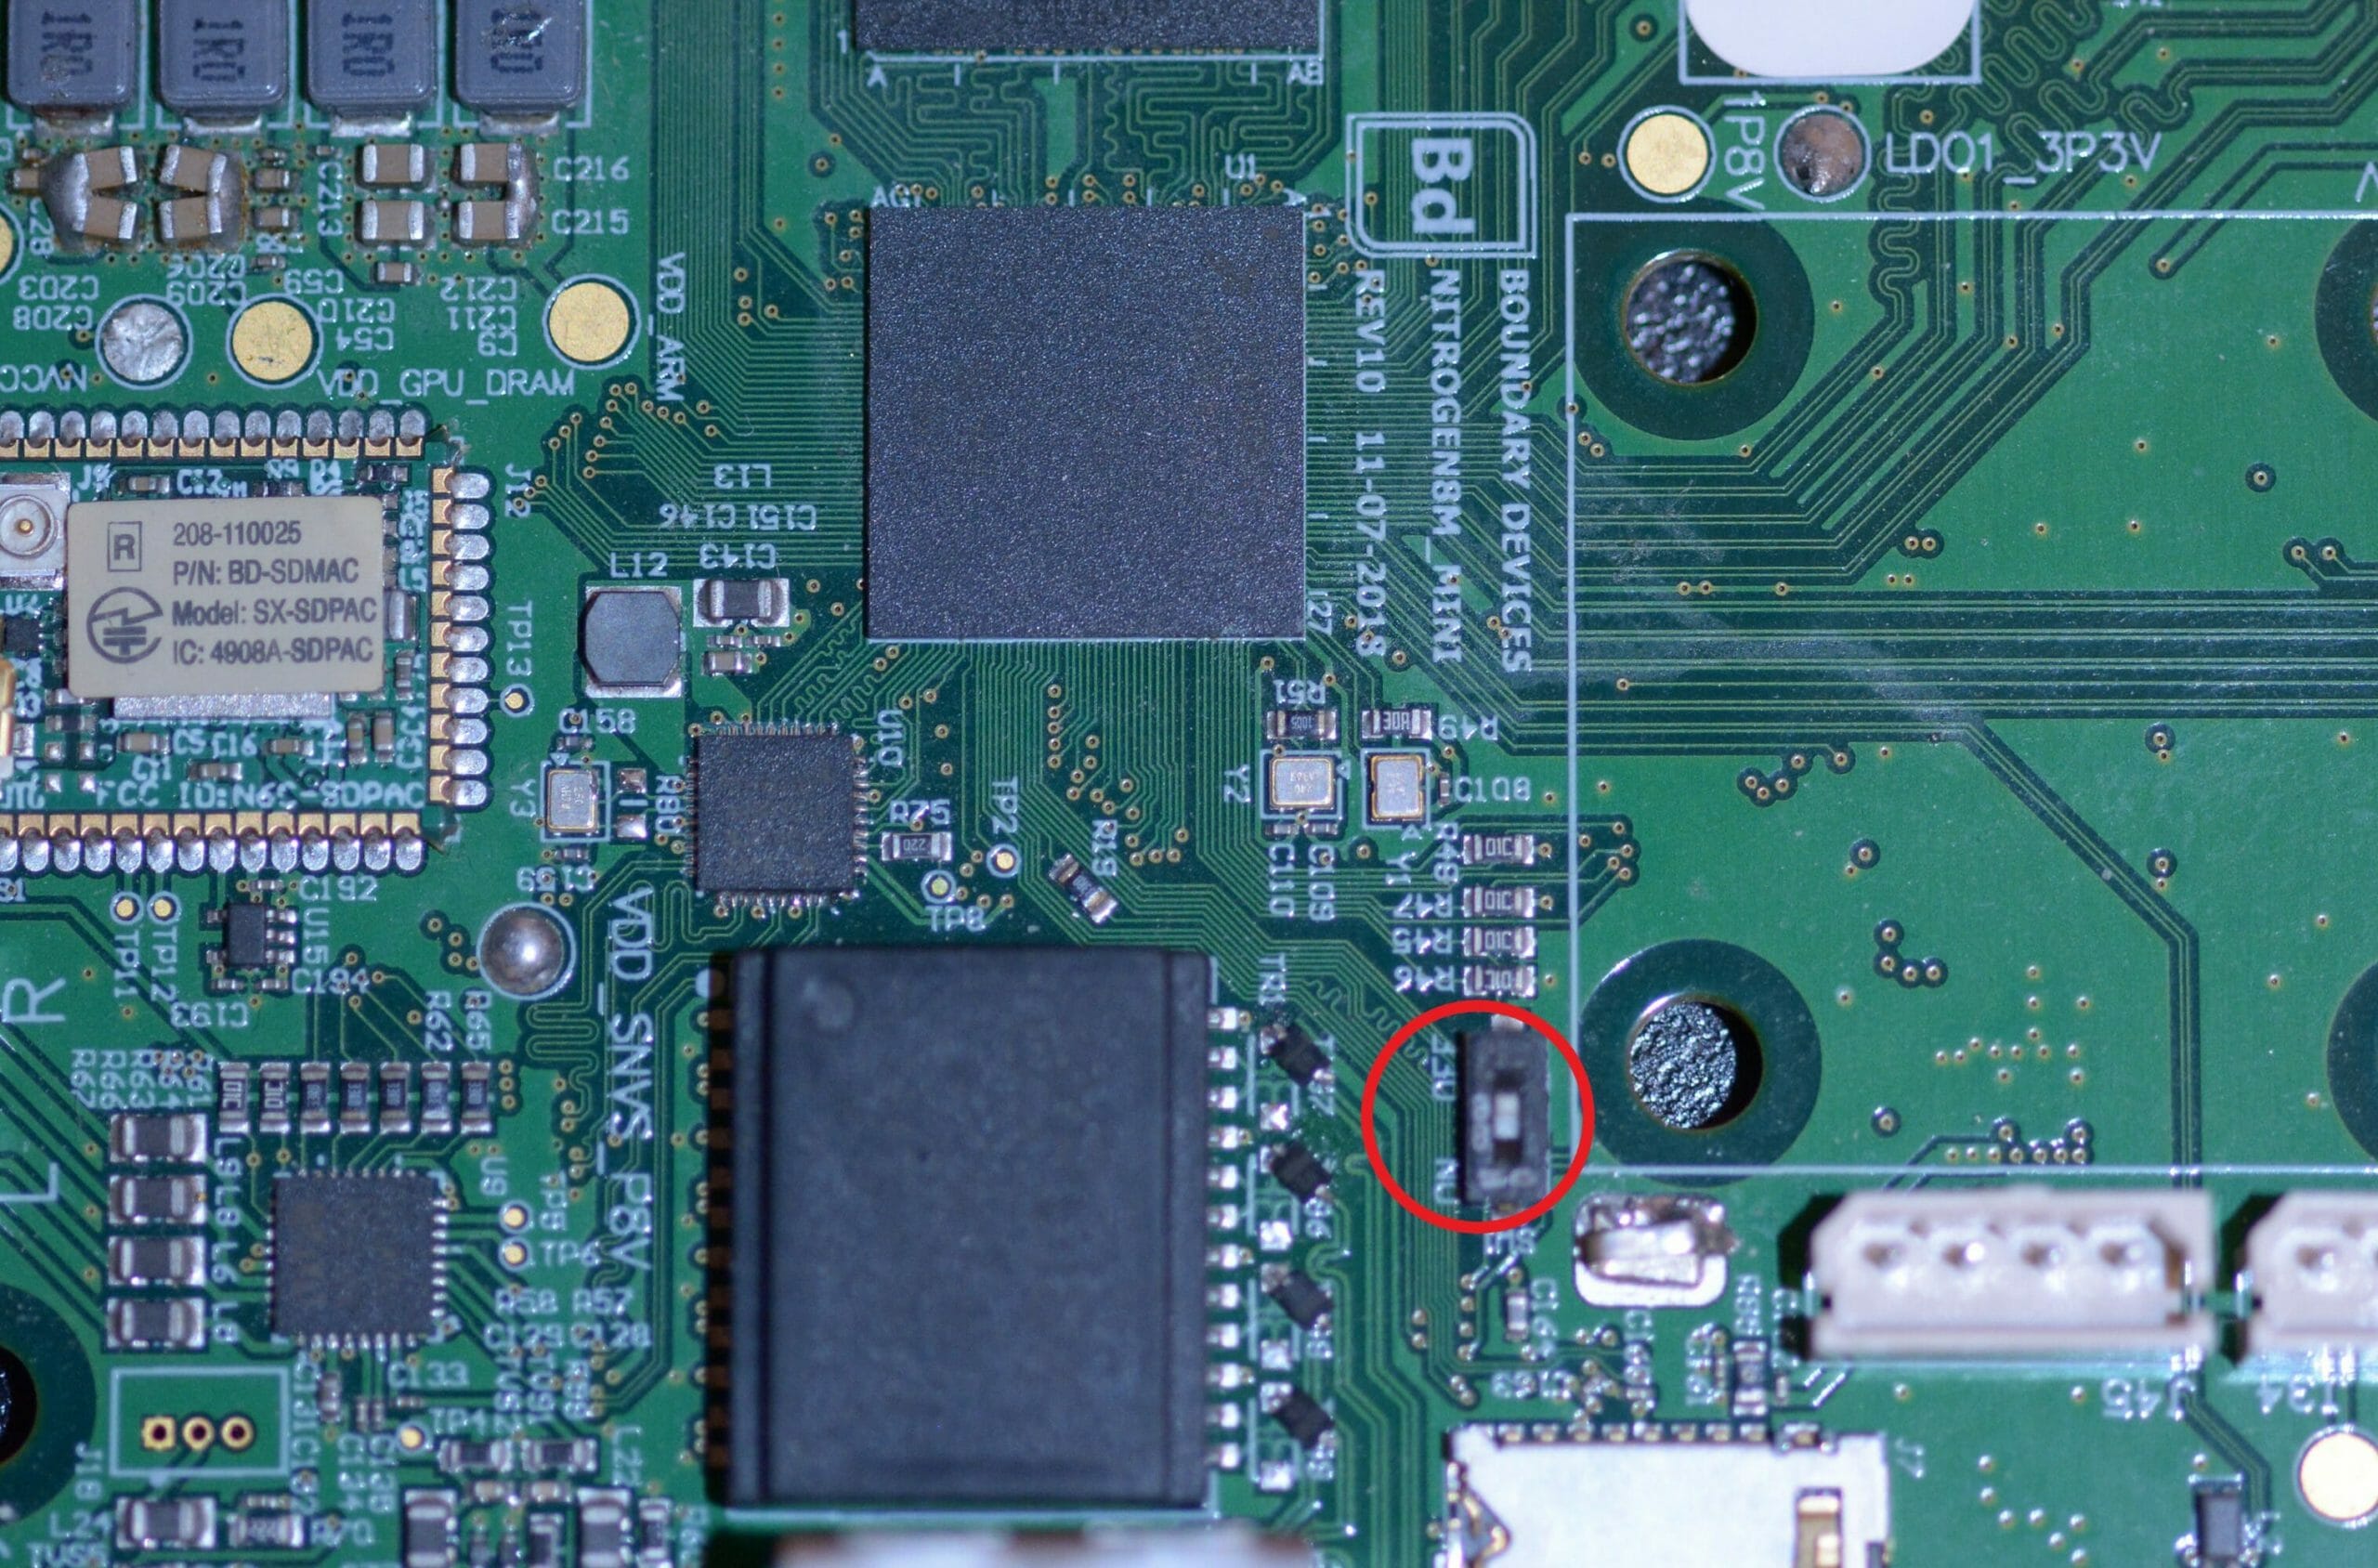
Then you'll need to push SW1 DIP switch to ON position
[caption id="attachment_35890" align="alignleft" width="330"][https://pejmank3.sg-host.com/attachments/DSC_0640-3.jpg
 ] SW1 position on Nitrogen8MQ[/caption] [caption id="attachment_35891" align="aligncenter" width="331"][https://pejmank3.sg-host.com/attachments/DSC_0641-3.jpg
 ] SW1 position on Nitrogen8M Mini[/caption]
Then you should be able to see the platform appears as a USB HID device on your linux PC's :
~$ lsusb | grep NXP
Bus 001 Device 010: ID 1fc9:012b NXP Semiconductors i.MX 8M...
or
Bus 001 Device 010: ID 1fc9:0134 NXP Semiconductors i.MX 8M Mini...
Finally, download our imx-usb-loader tool and run it:
~$ sudo apt install libusb-1.0-0-dev pkg-config
~$ git clone git://github.com/boundarydevices/imx_usb_loader
~$ cd imx_usb_loader/
~/imx_usb_loader$ make
...
~/imx_usb_loader$ ./imx_usb
Note that we recommend you have a look at the mx8mq_usb_work.conf or mx8mm_usb_work.conf file (depending on your board type) since it includes hardcoded paths ( ../u-boot-imx6/flash.bin ) which might differ on your machine.
Also, the above instructions require your user to have permissions to access the USB device.
Although adding sudo might solve this "issue", we highly recommend you use a udev rule instead.
Finally, in order to recover your platform, the imx_usb tool requires to have all binaries separately. That means it requires you to build your own version of U-Boot binaries by following the procedure above.
After you finished recovering your U-Boot, don't forget to set SW1 switch back to OFF on the board.
How to erase U-Boot environment?
In order to force the use of the default environment variables and save this instead.
=> env default -a
=> savee
How to enable secure booting with U-Boot?
All the i.MX processors embed some security engine which allows to sign/encrypt the boot-loader.
The article below details the engine architecture and how to enable/use it:
How can I boot from network?
The usual setup is to use a TFTP server to load the kernel, device tree and then share the rootfs from Host PC over NFS.
So you need to install both TFTP and NFS servers on your host PC. To do so, please follow this article:
Once this setup is done, we tried to simplify your life since the board only requires two variables to boot from network:
- The TFTP/NFS server IP
- The NFS rootfs path
Here is an example:
=> setenv tftpserverip 192.168.1.60
=> setenv nfsroot /srv/nfs/debian-arm64
=> run netboot